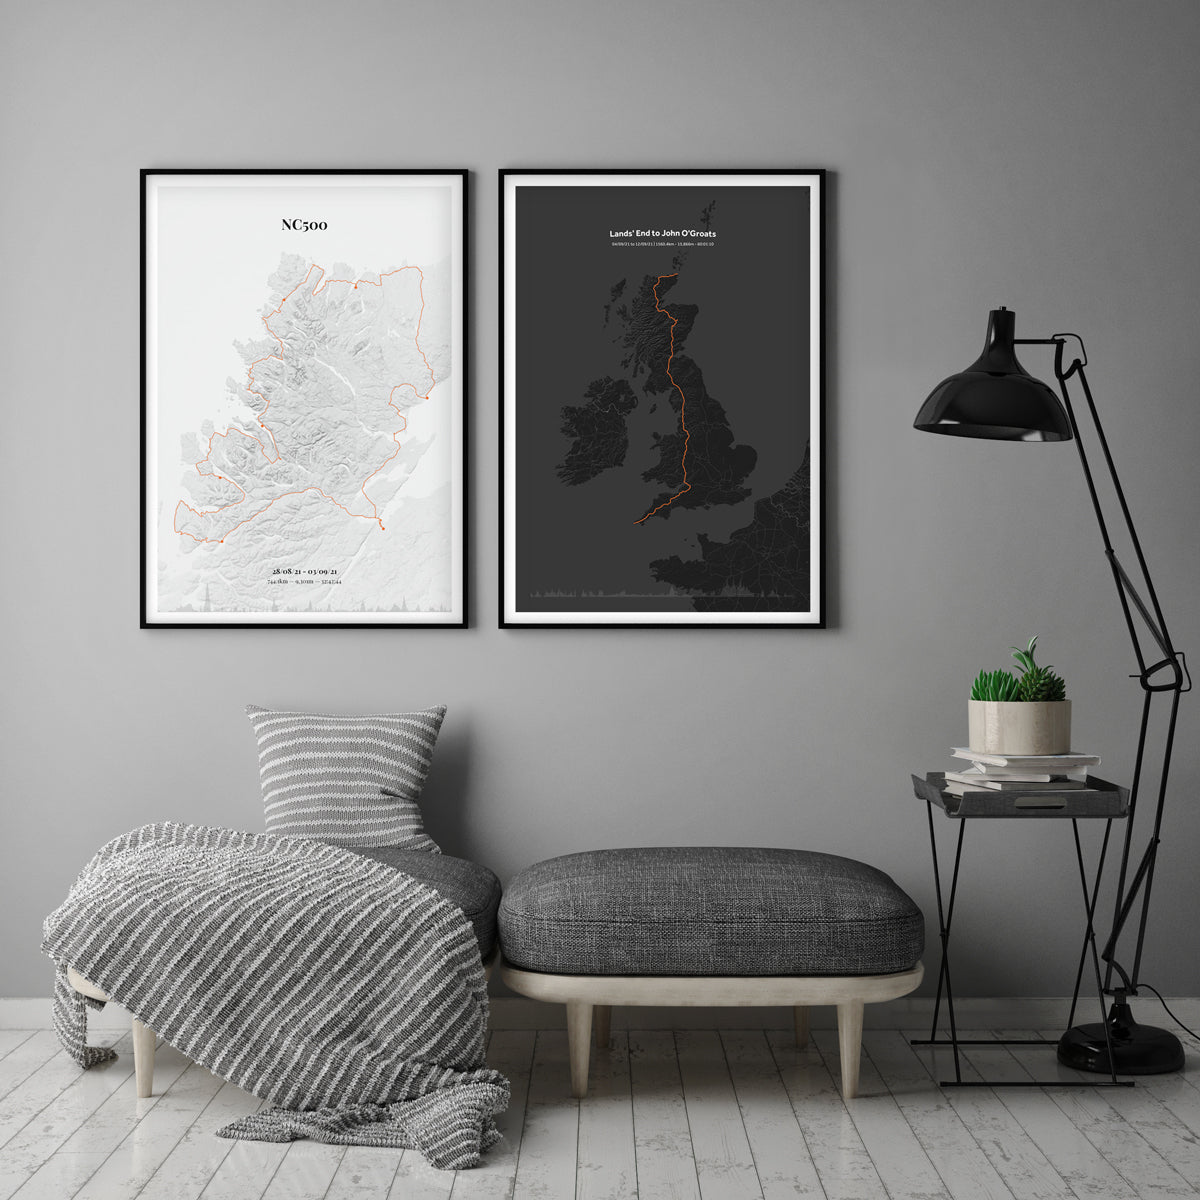
A good Strava poster comes down to five choices: the right ride, a colour scheme that suits the room, two or three stats rather than ten, a short line of text, and a size and frame that fit the wall. Get those right and a route line on paper turns into something people stop and ask about.
I'm Rob, and I make cycling prints from the Peak District. This post is about the design side, the bit that decides whether a Strava print looks great or just looks busy. If you want the button by button steps for getting your ride out of Strava and into the builder, I've covered that separately in how to turn a Strava ride into a map print.
Start with the right ride
The design can only be as good as the ride behind it. Before you think about colours, think about which ride deserves the wall.
Rides with a story
The prints that get looked at for years are the ones with a story attached. A first 100 miles, a sportive that finally went to plan, a ride with your dad, a week touring with friends. If you have to explain why it matters, that is a good sign.
Rides with an interesting shape
Some routes just look better on paper. A big loop, a point to point down a coastline or a climb full of hairpins all make strong shapes. A short out and back along the same road can end up as a single line that is hard to read, so it may be worth picking a different ride or combining a few.
One ride or several
You can put more than one ride on a print. A multi-day tour, an end to end or a season of rides in the same area can all sit together. The builder places them in the order you upload them, and small white gaps in the elevation profile show where one activity or day ends and the next begins. If you are planning something on the scale of a whole year, have a look at creating a Strava heatmap print.
Check the line before you start
GPS has bad days. If your device dropped signal or you forgot to stop it on the drive home, the line will show it. It is worth fixing the file first, and there are a few tips in fixing GPX files.
Choosing a colour scheme
Colour is the first thing anyone notices, so it is worth a few minutes.
- Think about the room, not just the ride. A print for a bright kitchen and one for a dark hallway or bike shed may want different schemes.
- Go for contrast. The route line needs to stand out clearly from the map underneath. If you have to squint to follow it, try another scheme.
- Match the frame. Dark schemes sit well in black frames, lighter ones in white or natural wood.
- Tweak if you need to. If the sea or background looks a bit murky in the preview, the custom colour editor lets you adjust it.
If you are stuck, a quieter colour scheme usually ages better than the brightest option on the screen.
Which stats to show
This is where most Strava prints go wrong. It is tempting to add every number Strava gives you, but a print crammed with figures looks like a spreadsheet.
The details people most often add are the rider's name, distance, time, elevation and the date. My advice is to pick two or three numbers that tell the story of that ride:
- For a hilly ride or a big climb, elevation is the hero number.
- For a long day like a first century, distance says it all.
- For an event, the finishing time is usually what the rider is proudest of.
- For a tour, total distance and the dates of the trip work well.
Add the date to almost every print. In ten years it is the detail you will be glad is there.
Adding text that works
Keep the words short. A title, a name and the date is plenty.
- Title: the event or the ride, such as "Fred Whitton" or "Peak District Loop".
- Name: the rider, or both names if it was a shared ride.
- A short line if you want one, such as "First 100 miles" or "With Dad".
You can also click the map to add your own marker and edit its text, which is handy for labelling a café stop, a summit or the place you stayed each night. Use a few of these, not dozens.
Before you order, read every word out loud. Typos in names and dates are the most common thing people want to change, and it is much easier to catch them now.
Picking a size
A3 prints start from £35, and A3 works well on a desk, a shelf or a smaller wall. If the poster is the main thing on a big wall, or the route is long and detailed, A2 gives it more room to breathe.
A rough rule I use: the more detail in the route (lots of days, lots of twists, lots of markers), the more a bigger size helps.
Framing and hanging
A simple frame does most of the work. A thin black, white or wood frame with a white mount suits nearly every scheme. If you would rather the print arrived ready to hang, there is a framed option, with the frame priced on top of the print.
Hang it at eye height, somewhere you walk past every day. Hallways, home offices and the wall by the bike are all good spots. If you have a few prints, a pair hung side by side looks better than one lonely poster at each end of the house.
Strava poster ideas to get you started
- Your first century, with distance and date.
- A favourite local loop, the one you ride every weekend.
- A big climb abroad, with elevation and your time. My guide on how to ride Alpe d'Huez has a few ideas if that is on your list.
- An end to end or Coast to Coast, every day on one print. I've written more about keepsakes for LEJOG and other big rides.
- A gravel adventure. The best UK gravel routes make brilliant shapes on paper.
If you want something more playful than a map, the Strava art prints are worth a look too.
FAQ
What makes a good Strava poster?
A ride with a story, a colour scheme with clear contrast, two or three stats, a short title and a sensible size. Less is usually more.
Which stats should I put on a Strava print?
Pick the numbers that tell the story of that ride. Elevation for a climb, distance for a long day, time for an event, plus the date on almost every print.
Can I put several rides on one Strava poster?
Yes. Add each ride in turn and reorder them if needed. White gaps in the elevation profile show where each activity starts.
Will I see my design before it is printed?
Yes. You review the design and confirm you are happy before it goes to print, and if I make it for you, I send a proof first.
Make your own
If there is a ride you keep scrolling back to on Strava, it might be time to give it a proper spot on the wall. Have a play with the colours and stats in the map builder, and if you would rather I designed it for you, the Done For You option is there. Every print is made in the UK.